
A resin floor can be beautifully expressive – metallic movement, terrazzo-inspired detail, a quiet concrete-effect finish or a hard-working commercial coating. But none of that visual impact matters if the surface beneath it has been rushed. Preparing concrete for epoxy is where the quality of the finished floor is decided, long before the first coat brings colour, depth or sheen into the room.
For homeowners and commercial clients alike, preparation is not an invisible extra. It is the work that helps a seamless floor remain bonded, level and refined through daily use. A well-prepared substrate gives an epoxy system the stable canvas it needs to perform as designed.
Why concrete preparation defines the result
Concrete may look solid, but it is rarely a ready-to-coat surface. It can hold moisture, carry residues from previous use, include weak areas at the top of the slab, and contain fine cracks that will show through a decorative finish if left untreated. Garage floors often have oil contamination. Retail and warehouse slabs may have old paint, adhesive or curing compounds. In a domestic extension, the concrete may simply be too new or too damp.
Epoxy bonds mechanically to a properly profiled concrete surface. It needs clean, sound material with enough texture for the resin to grip. If it is applied over dust, laitance – the weak, powdery layer often found on new concrete – or hidden contamination, the coating can lose adhesion. The result may be bubbling, peeling or areas that sound hollow underfoot.
A premium resin installation is therefore not about coating over a floor. It is about creating the correct foundation for a finish that feels intentional from edge to edge.
Start by understanding the slab
Before any preparation begins, the existing concrete needs a careful assessment. Its age, condition, use history and moisture level all influence the specification. A slab that has supported a family car for years requires a different approach from a newly poured kitchen extension, even if both are destined for a decorative epoxy surface.
Check strength, damage and previous coatings
The first question is whether the concrete is sound. Loose or friable areas must be removed rather than covered. Surface cracks need to be assessed too: some are superficial shrinkage cracks, while others indicate movement that a rigid resin finish cannot simply disguise.
Previous coatings also matter. Paint, sealers, levelling compounds and adhesives can interrupt adhesion, and they are not always obvious. A clear sealer on concrete can make the surface appear clean while preventing the epoxy from anchoring properly. In practical terms, preparation often means taking the slab back to a stable, open-pored surface rather than trusting what is already there.
Test for moisture, not just appearance
A floor can look completely dry and still contain enough moisture vapour to cause problems beneath an impermeable coating. This is especially relevant for ground-floor rooms, older properties without a reliable damp-proof membrane, and recently laid slabs.
Professional moisture testing provides a clearer picture than guesswork. The appropriate method and acceptable reading depend on the epoxy system being specified. If moisture is above the product’s tolerance, a suitable moisture-mitigating primer may be needed. In other cases, allowing more drying time is the right answer. Applying resin too soon may save a few days at the start of a project and cost the entire floor later.
Preparing concrete for epoxy: the professional process
The exact method depends on the project, but the objective remains consistent: remove anything weak or contaminating, create the required surface profile, repair defects and leave the floor meticulously clean.
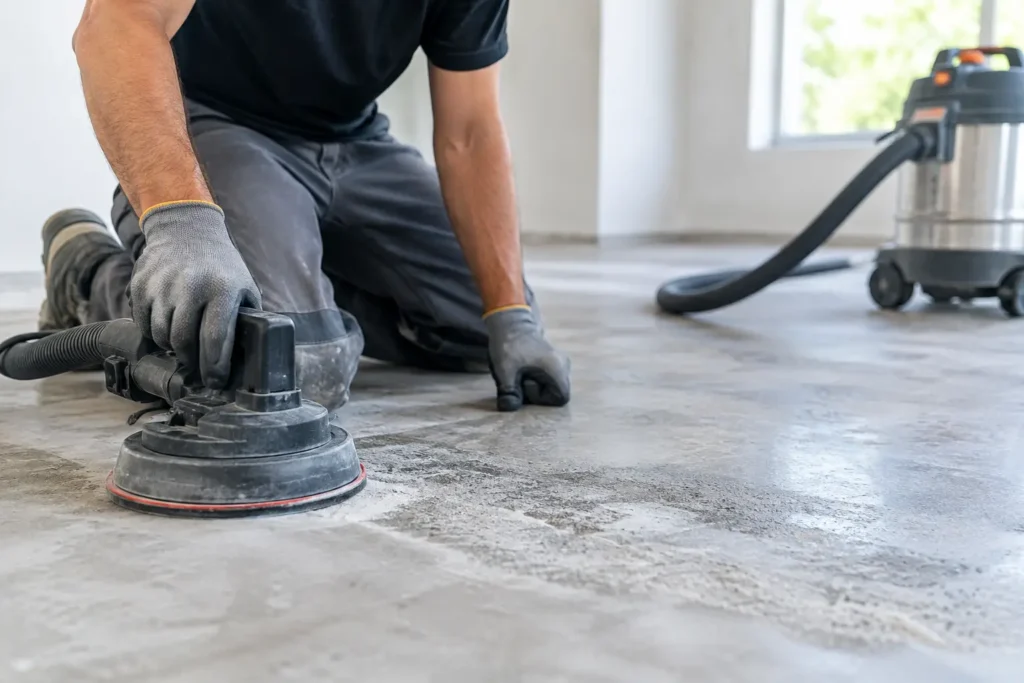
Mechanical preparation is usually the most reliable route. Diamond grinding removes weak surface material, old coatings and light contamination while opening the pores of the concrete. It is particularly well suited to interior spaces where controlled, precise preparation is needed before a design-led resin finish. Shot blasting can be effective over larger commercial areas, creating a more pronounced profile for heavier-duty coating systems.
Acid etching is sometimes discussed as a shortcut, but it is not a universal answer. It can be inconsistent, does not reliably remove all contaminants or existing coatings, and introduces the need for thorough neutralisation and drying. For a premium floor where appearance and long-term performance both matter, mechanical preparation offers far greater control.
Once the concrete is opened, repairs can be completed. Cracks, small holes, joints and localised damage are filled with materials chosen to suit the movement and requirements of the floor. Care is taken to feather and refine repaired areas, particularly beneath smooth, gloss or metallic finishes where raking light may reveal every imperfection. A decorative floor is unforgiving in the best possible way: it rewards precision.
The prepared surface is then thoroughly vacuumed using professional dust extraction. This stage should not be treated as housekeeping. Fine grinding dust left on the slab can interfere with primer adhesion, so the floor must be clean, dry and free from loose material before the resin system begins.
The surface profile should suit the finish
More texture is not always better. The right concrete profile depends on the coating thickness and the demands of the space. A thin decorative epoxy system needs a controlled, even key, while a thicker commercial build-up may require a more substantial profile to support its performance.
This is why a one-size-fits-all approach can produce disappointing results. Over-grinding can expose aggregate or create a patchy visual base that complicates a translucent finish. Under-preparing leaves the slab too smooth for a dependable bond. The best preparation is calibrated to the resin system, the existing floor and the final aesthetic.
For instance, a calm concrete-effect finish in a kitchen or hallway benefits from a substrate that has been carefully levelled and refined. A warehouse or garage coating must contend with more abrasion, vehicle traffic and impact, so the preparation and build-up need to reflect those pressures. Both floors deserve technical discipline, but they do not need identical treatment.
Timing, temperature and site conditions matter
Concrete preparation does not happen in isolation from the rest of the installation. The room must be protected from dust, unexpected trades and moisture while the surface is being prepared and coated. In refurbishment projects, coordinating this work at the right point in the programme prevents fresh damage from being carried into a finished resin floor.
Temperature and humidity affect epoxy cure times, working windows and the risk of surface defects. Cold slabs can slow curing, while excessive humidity may create issues with certain systems. A professional installer considers these conditions before specifying the process, rather than treating resin as an ordinary paint that can be applied whenever the room is empty.
It is also wise to allow new concrete adequate curing time. Twenty-eight days is often used as a general benchmark, but the right decision should be based on the slab, the environment and product guidance, supported by moisture testing. Rushing a new extension floor is one of the most avoidable causes of coating failure.
Avoid the tempting shortcuts
Sweeping a floor and applying epoxy straight from the tin is not preparation. Nor is painting over old floor paint in the hope that the new coating will hold it together. These shortcuts can appear economical, especially in a garage or utility room, but they place the lifespan of the entire finish on an unknown layer beneath it.
Similarly, filling visible cracks without addressing weak concrete around them can lead to a floor that looks perfect on day one but develops blemishes as it settles into use. The right approach is not always the quickest route, and it is not always the same route from one project to the next. That is the value of an informed site assessment.
A considered base creates a better space
The most striking resin surfaces feel effortless once complete. Light travels across them cleanly, their colour has depth, and the absence of grout lines allows the architecture of a room to breathe. That effect begins with work most people will never see.
At Resinize, preparation is treated as part of the craftsmanship, not a preliminary chore. Whether the brief is a statement hallway, a refined bathroom surface or a hard-wearing commercial floor in Essex or London, the goal is the same: build the finish on a concrete base worthy of it.
Before choosing colour, aggregate or sheen, give the concrete the attention it deserves. A well-prepared floor does more than help epoxy adhere – it gives your chosen design the confidence to remain beautiful under real life.