
Repairing Chipped Resin Floors Without Spoiling Style

Repairing Chipped Resin Floors Without Spoiling Style

A chip in a resin floor can feel disproportionately noticeable. On a seamless, light-reflecting surface, even a small break catches the eye – particularly in a carefully designed kitchen, hallway, retail space or garage. Repairing chipped resin floors properly is not simply about hiding damage. It is about restoring the continuity, strength and visual calm that made the finish so appealing in the first place.

Resin is exceptionally durable, but no floor is entirely immune to a sharp impact, heavy dropped object or damage at an exposed edge. The good news is that many chips can be repaired discreetly. The outcome depends on identifying why the chip appeared, matching the original system and treating the surrounding finish with the same care that went into its installation.

First, establish what caused the chip

A small, isolated chip caused by a dropped pan, tool or piece of equipment is usually a localised repair. The resin around it should be sound, firmly bonded and free from cracks. In this case, the aim is to rebuild the missing material, refine the surface and blend the repaired area into the wider floor.

Damage at doorways, steps, drains, thresholds and wall edges deserves closer attention. These are transition points where movement, repeated impact or inadequate edge protection can place extra pressure on the coating. A chip that keeps returning may indicate a substrate issue, moisture beneath the system, floor movement or an unsuitable resin build-up for the environment.

This distinction matters. Filling a chip without addressing the cause can produce a neat result for a short while, only for the same area to fail again. A professional assessment should consider the resin layer, the primer bond and the concrete or screed beneath it before any repair work begins.

Can every resin chip be made invisible?

Not always, and this is where honest advice matters. A well-executed repair can be extremely subtle, especially on a solid-colour floor with a satin or matt finish. However, a perfect invisible repair cannot be guaranteed on every surface.

Metallic resin, terrazzo-inspired systems, decorative flakes and highly polished gloss finishes have movement, depth and light play that cannot be recreated by applying a simple patch. The repair needs to be colour-matched, feathered and finished with an understanding of the original design. On a floor with deliberately varied pigments or aggregates, a skilled installer may need to introduce colour variation or selected chips by hand so the repaired area belongs to the composition rather than sitting on top of it.

Even then, viewing angle matters. A repair may disappear in normal use but remain faintly perceptible in direct low-level sunlight. This is often an acceptable trade-off against recoating an entire room, but it should be discussed before work starts.

The careful process behind repairing chipped resin floors

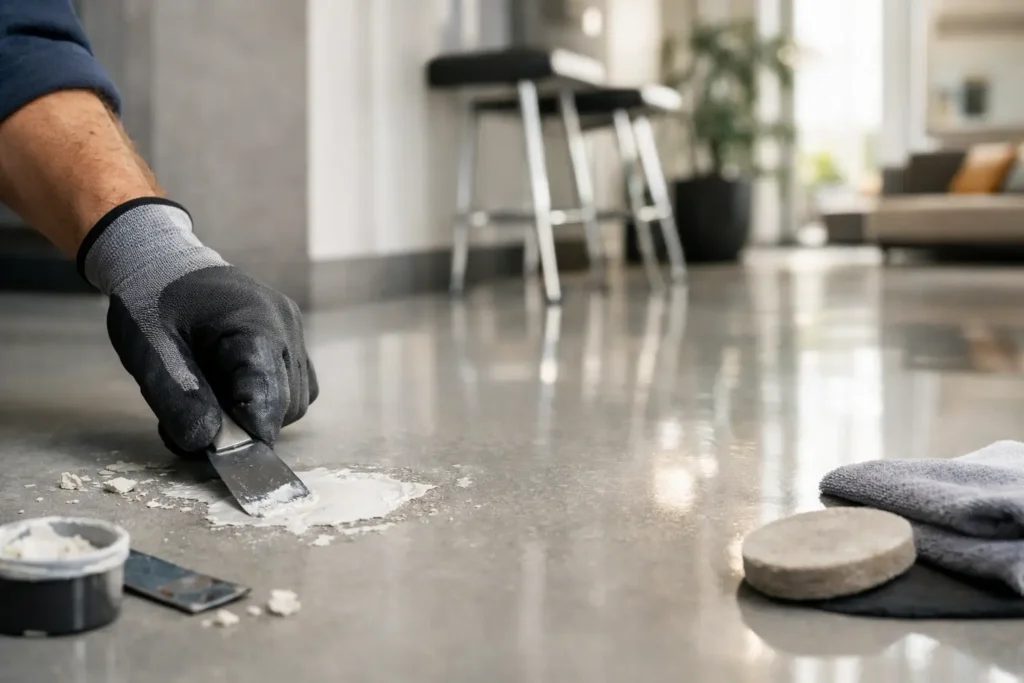
A lasting repair begins with preparation, not filler. Loose or poorly bonded material is removed until the repair reaches a stable edge. The area is then cleaned thoroughly to eliminate dust, grease, cleaning residues and moisture. Contamination is one of the most common reasons local repairs fail to bond.

The damaged section is lightly abraded to create a mechanical key, while the surrounding surface is protected from unnecessary scratching. The installer then selects a compatible resin repair material. Compatibility is critical: epoxy, polyurethane and hybrid systems behave differently, and an unsuitable product can cure at a different rate, remain too rigid or show an obvious difference in sheen.

Once the material is placed, it is levelled carefully with the existing floor. Deeper chips may require more than one application so that the resin cures evenly and does not shrink below the surrounding finish. On decorative surfaces, this is the stage where pigments, flakes or fine aggregates are added to rebuild the character of the original design.

After curing, the repaired section is refined through controlled sanding or polishing, then sealed or top-coated where appropriate. The final coat is not merely cosmetic. It helps even out sheen, improve cleanability and protect the repaired edge from staining and wear.

Why colour and sheen matching need experience

Resin surfaces are rarely one-dimensional. A warm grey can carry blue, green or taupe undertones. A white floor may have a subtle cream cast. Even a nominally clear topcoat can alter how the base colour is perceived, particularly after years of sunlight and everyday use.

A repair material mixed to the original specification may therefore look slightly different against an aged floor. The same applies to gloss level. A small repair with a higher sheen than the surrounding surface can look more prominent than the chip itself. This is why experienced installers assess the floor in the room, under its natural and artificial lighting, rather than relying on a colour chart alone.

Where a large or highly visible area is affected, a broader blended repair or a renewed topcoat across the full space can create the more convincing result. It involves more work, but it can restore a consistent visual field – especially in open-plan interiors where the floor is a defining design feature.

When a DIY repair is sensible, and when it is not

For a tiny chip in a utility area or workshop, a carefully chosen resin repair kit may be adequate. The floor must be clean, dry and structurally sound, and expectations should be realistic. A small patch can protect the substrate from further damage without needing to become an invisible piece of craftsmanship.

A prominent domestic floor, a wet room, a commercial entrance or a space with a decorative finish is different. These surfaces call for more controlled preparation, material selection and finishing. Excess resin, poor sanding or a mismatched topcoat can leave a repair that is raised, dull, sticky or visibly different in colour. Attempting to correct that second problem often requires a larger intervention than the original chip did.

Commercial settings also bring practical considerations. Warehouses and garages may need a repair system that withstands tyre traffic, oils, pallet trucks or chemical exposure. A retail floor needs to return to service with minimal disruption. In these cases, the right repair is as much about performance and curing time as it is about appearance.

Protect the repaired area from repeat damage

Once repaired, a resin floor should be treated as a high-performance architectural finish, not an indestructible surface. Use protective pads beneath heavy furniture, avoid dragging metal-legged items and place suitable mats at entrances to reduce grit. In garages and workshops, protect areas where jacks, stands and heavy tools are routinely used.

Cleaning also makes a difference. Sweep away abrasive dirt regularly and use a pH-neutral cleaner suited to resin finishes. Harsh cleaners, scouring pads and aggressive solvents can dull the topcoat, making repaired areas stand out sooner than they otherwise would. A floor that is maintained consistently develops an even patina, which helps preserve its seamless appearance.

If a chip has exposed concrete or screed, do not leave it open for months. Moisture and dirt can enter the damaged point, complicating a later repair. Prompt attention keeps a local defect local.

A repair should respect the original design

The best resin floor repairs do more than fill a void. They preserve the calm expanse of a concrete-effect hallway, the depth of a metallic feature floor or the refined detail of a terrazzo-inspired surface. That calls for technical judgement and an eye for how colour, texture and light work together.

For homeowners and businesses across Essex and London, Resinize approaches repairs with the same design-led care used in creating a new surface. A chip may be small, but the finish around it is part of the wider room. Restoring it thoughtfully protects both the floor’s performance and the atmosphere it was designed to create.

A repaired resin floor should not ask for attention every time you walk through the room. With the right diagnosis, compatible materials and a precise finish, it can return to doing what it does best: providing a durable, beautifully continuous foundation for everyday life.

Leave a Comment

Your email address will not be published. Required fields are marked *

Repairing Chipped Resin Floors Without Spoiling Style

Repairing Chipped Resin Floors Without Spoiling Style

A chip in a resin floor can feel disproportionately noticeable. On a seamless, light-reflecting surface, even a small break catches the eye – particularly in a carefully designed kitchen, hallway, retail space or garage. Repairing chipped resin floors properly is not simply about hiding damage. It is about restoring the continuity, strength and visual calm that made the finish so appealing in the first place.

Resin is exceptionally durable, but no floor is entirely immune to a sharp impact, heavy dropped object or damage at an exposed edge. The good news is that many chips can be repaired discreetly. The outcome depends on identifying why the chip appeared, matching the original system and treating the surrounding finish with the same care that went into its installation.

First, establish what caused the chip

A small, isolated chip caused by a dropped pan, tool or piece of equipment is usually a localised repair. The resin around it should be sound, firmly bonded and free from cracks. In this case, the aim is to rebuild the missing material, refine the surface and blend the repaired area into the wider floor.

Damage at doorways, steps, drains, thresholds and wall edges deserves closer attention. These are transition points where movement, repeated impact or inadequate edge protection can place extra pressure on the coating. A chip that keeps returning may indicate a substrate issue, moisture beneath the system, floor movement or an unsuitable resin build-up for the environment.

This distinction matters. Filling a chip without addressing the cause can produce a neat result for a short while, only for the same area to fail again. A professional assessment should consider the resin layer, the primer bond and the concrete or screed beneath it before any repair work begins.

Can every resin chip be made invisible?

Not always, and this is where honest advice matters. A well-executed repair can be extremely subtle, especially on a solid-colour floor with a satin or matt finish. However, a perfect invisible repair cannot be guaranteed on every surface.

Metallic resin, terrazzo-inspired systems, decorative flakes and highly polished gloss finishes have movement, depth and light play that cannot be recreated by applying a simple patch. The repair needs to be colour-matched, feathered and finished with an understanding of the original design. On a floor with deliberately varied pigments or aggregates, a skilled installer may need to introduce colour variation or selected chips by hand so the repaired area belongs to the composition rather than sitting on top of it.

Even then, viewing angle matters. A repair may disappear in normal use but remain faintly perceptible in direct low-level sunlight. This is often an acceptable trade-off against recoating an entire room, but it should be discussed before work starts.

The careful process behind repairing chipped resin floors

A lasting repair begins with preparation, not filler. Loose or poorly bonded material is removed until the repair reaches a stable edge. The area is then cleaned thoroughly to eliminate dust, grease, cleaning residues and moisture. Contamination is one of the most common reasons local repairs fail to bond.

The damaged section is lightly abraded to create a mechanical key, while the surrounding surface is protected from unnecessary scratching. The installer then selects a compatible resin repair material. Compatibility is critical: epoxy, polyurethane and hybrid systems behave differently, and an unsuitable product can cure at a different rate, remain too rigid or show an obvious difference in sheen.

Once the material is placed, it is levelled carefully with the existing floor. Deeper chips may require more than one application so that the resin cures evenly and does not shrink below the surrounding finish. On decorative surfaces, this is the stage where pigments, flakes or fine aggregates are added to rebuild the character of the original design.

After curing, the repaired section is refined through controlled sanding or polishing, then sealed or top-coated where appropriate. The final coat is not merely cosmetic. It helps even out sheen, improve cleanability and protect the repaired edge from staining and wear.

Why colour and sheen matching need experience

Resin surfaces are rarely one-dimensional. A warm grey can carry blue, green or taupe undertones. A white floor may have a subtle cream cast. Even a nominally clear topcoat can alter how the base colour is perceived, particularly after years of sunlight and everyday use.

A repair material mixed to the original specification may therefore look slightly different against an aged floor. The same applies to gloss level. A small repair with a higher sheen than the surrounding surface can look more prominent than the chip itself. This is why experienced installers assess the floor in the room, under its natural and artificial lighting, rather than relying on a colour chart alone.

Where a large or highly visible area is affected, a broader blended repair or a renewed topcoat across the full space can create the more convincing result. It involves more work, but it can restore a consistent visual field – especially in open-plan interiors where the floor is a defining design feature.

When a DIY repair is sensible, and when it is not

For a tiny chip in a utility area or workshop, a carefully chosen resin repair kit may be adequate. The floor must be clean, dry and structurally sound, and expectations should be realistic. A small patch can protect the substrate from further damage without needing to become an invisible piece of craftsmanship.

A prominent domestic floor, a wet room, a commercial entrance or a space with a decorative finish is different. These surfaces call for more controlled preparation, material selection and finishing. Excess resin, poor sanding or a mismatched topcoat can leave a repair that is raised, dull, sticky or visibly different in colour. Attempting to correct that second problem often requires a larger intervention than the original chip did.

Commercial settings also bring practical considerations. Warehouses and garages may need a repair system that withstands tyre traffic, oils, pallet trucks or chemical exposure. A retail floor needs to return to service with minimal disruption. In these cases, the right repair is as much about performance and curing time as it is about appearance.

Protect the repaired area from repeat damage

Once repaired, a resin floor should be treated as a high-performance architectural finish, not an indestructible surface. Use protective pads beneath heavy furniture, avoid dragging metal-legged items and place suitable mats at entrances to reduce grit. In garages and workshops, protect areas where jacks, stands and heavy tools are routinely used.

Cleaning also makes a difference. Sweep away abrasive dirt regularly and use a pH-neutral cleaner suited to resin finishes. Harsh cleaners, scouring pads and aggressive solvents can dull the topcoat, making repaired areas stand out sooner than they otherwise would. A floor that is maintained consistently develops an even patina, which helps preserve its seamless appearance.

If a chip has exposed concrete or screed, do not leave it open for months. Moisture and dirt can enter the damaged point, complicating a later repair. Prompt attention keeps a local defect local.

A repair should respect the original design

The best resin floor repairs do more than fill a void. They preserve the calm expanse of a concrete-effect hallway, the depth of a metallic feature floor or the refined detail of a terrazzo-inspired surface. That calls for technical judgement and an eye for how colour, texture and light work together.

For homeowners and businesses across Essex and London, Resinize approaches repairs with the same design-led care used in creating a new surface. A chip may be small, but the finish around it is part of the wider room. Restoring it thoughtfully protects both the floor’s performance and the atmosphere it was designed to create.

A repaired resin floor should not ask for attention every time you walk through the room. With the right diagnosis, compatible materials and a precise finish, it can return to doing what it does best: providing a durable, beautifully continuous foundation for everyday life.

Leave a Comment

Your email address will not be published. Required fields are marked *