A few bubbles can turn an otherwise beautiful resin surface into a distraction, especially when light catches a glossy floor or feature wall. Fixing bubbles in epoxy is not simply a matter of passing a flame over the surface. The right response depends on when the bubbles appear, what caused them, and whether the resin is still workable.
For a polished, seamless finish, prevention will always be more effective than rescue. Yet bubbles do happen, even on carefully planned projects. Understanding how to deal with them calmly protects both the visual impact and the long-term performance of the surface.
Fixing Bubbles in Epoxy Starts Before the Pour
Epoxy bubbles are usually air or gas trying to escape through the resin. They may come from the mixing process, the substrate below, the surrounding air, or the materials introduced into the design. Each cause leaves a slightly different clue.
Air introduced while mixing is one of the most common culprits. Mixing too quickly whips air into the resin in much the same way as stirring cream. Those tiny bubbles may rise and burst if the epoxy has enough working time, but in a thicker pour or a fast-curing system, they can become trapped before reaching the surface.
The substrate is equally important. Concrete, timber and some existing floor finishes can hold moisture and air in small pores. When epoxy is applied, particularly as temperatures rise, that air expands and moves upwards. The result is a scatter of bubbles that can appear after the pour looked perfectly smooth.
Temperature also has a quiet but significant influence. A floor warming in direct sun, or a room heated shortly after application, encourages air within the substrate to expand. Conversely, resin that is too cold becomes thicker and releases bubbles less readily. The ideal environment is stable, clean and within the product manufacturer’s recommended temperature range.
Moisture presents a more serious concern. It can cause bubbling, cloudiness, poor adhesion or a compromised cure. In kitchens, garages, ground-floor rooms and commercial settings, the condition of the slab must be assessed before any decorative or heavy-duty resin system is installed. A flawless-looking finish is of little value if it later lifts or fails.
What to Do While the Epoxy Is Still Wet
If bubbles are visible during the working window, act gently and promptly. First, give the resin a short moment to level. Many small bubbles will rise naturally, particularly in a thinner coating. Overworking the surface too early can create marks or introduce more air.
For persistent surface bubbles, a light pass with a suitable heat source can help them break. The key word is light. Keep the heat moving, hold it at a safe distance and avoid concentrating it in one area. Excess heat can scorch the resin, disturb metallic pigments, create ripples or accelerate curing unevenly. An open flame also requires extra care around solvents, dust and site conditions.
A spiked roller is often used on appropriate floor systems to release trapped air and improve levelling. It should be rolled consistently during the stated application window, using clean footwear and the correct roller for the coating. This is not a universal fix: on intricate metallic finishes, terrazzo-style decorative surfaces or resin work containing selected aggregates, the technique must suit the intended aesthetic. A roller used too aggressively can leave tracks and disrupt the design.
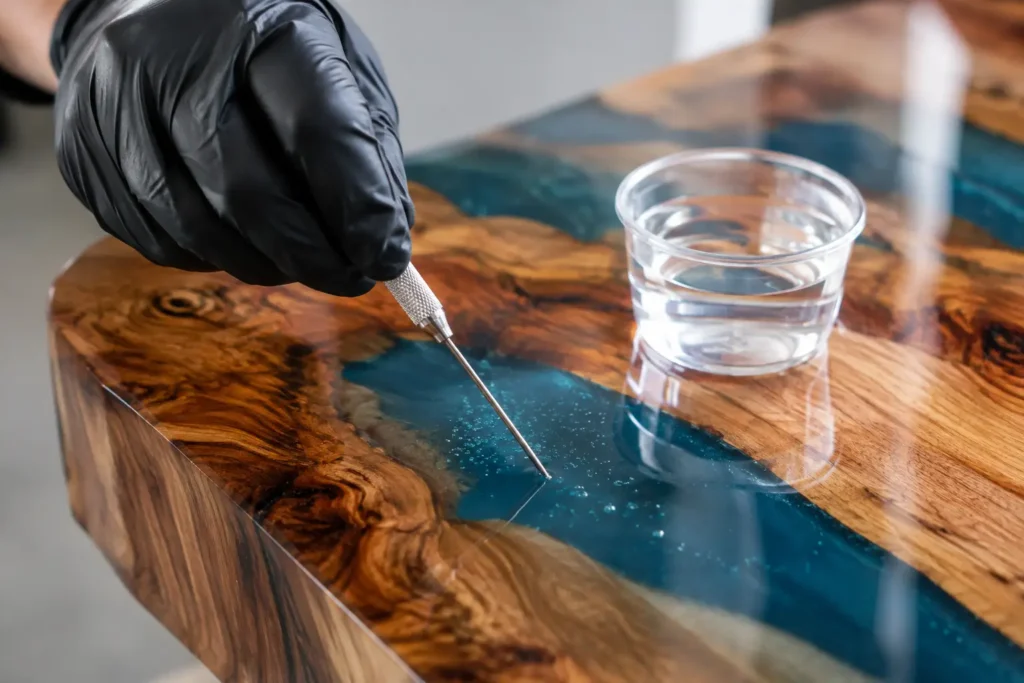
If a single larger bubble remains, it may be possible to tease it open with a clean pin and allow the resin to flow back together. This is best reserved for isolated imperfections. Repeated poking across a floor is likely to leave more evidence than the original bubbles.
The aim is to release air without disturbing the composition. On a premium resin surface, the quality comes from controlled application rather than frantic correction.
Avoid the temptation to keep reheating
Heat is useful, but it is not a cure-all. Repeated torching is a common route to uneven gloss, yellowing, surface distortion and a patchy finish. It can also hide a deeper issue, such as moisture in the concrete or an incorrectly prepared base.
If bubbles continue to return after careful rolling or a gentle heat pass, pause and consider why. A substrate releasing air will not be solved by more heat at the surface. On a sizeable floor, this is the point where professional judgement can prevent a costly compromise.
Repairing Bubbles After the Resin Has Cured
Once epoxy has cured, surface bubbles cannot be melted away. Repair is still possible, but it becomes a process of careful preparation and recoating.
Small, shallow pinholes can often be sanded back to create a sound key, cleaned thoroughly and filled with a compatible clear resin or repair material. Once cured, the area may need further sanding before a fresh topcoat is applied. The success of this method depends on the original finish. A plain colour or clear coating is generally more forgiving than a highly reflective metallic floor, where even a subtle repair can catch the eye.
For a wider area of pitting or numerous bubbles, a full abrasion and recoat may give the most convincing result. The existing resin must be mechanically keyed, all sanding dust removed, and the new coat applied within the technical requirements of the system. Skipping these stages risks poor intercoat adhesion, creating a repair that looks better initially but may delaminate later.
Deep bubbles or blisters deserve more investigation. If they have formed because of rising damp, contamination, movement in the substrate or a failing previous coating, simply filling them will not resolve the cause. The affected area may need to be removed and the base properly treated before a new resin layer is installed.
This is where the distinction between a cosmetic blemish and a technical failure matters. A few tiny bubbles in an industrial utility area may be acceptable if performance is unaffected. In a reception space, luxury bathroom or open-plan kitchen, the same imperfection can undermine the whole architectural effect. Expectations should match the room, the lighting and the chosen finish.
How a Professional Finish Prevents Bubbles
A bubble-free resin floor is shaped by the work that happens before the resin reaches the room. Professional installation begins with assessing the substrate for moisture, porosity, contamination, cracks and previous coatings. It continues with the right primer, the correct resin specification, measured mixing and controlled application conditions.
Material temperature matters as well. Resin components should be stored and conditioned appropriately before use, not brought from a cold van straight into a pour. Mixing should be slow and deliberate, with attention paid to the sides and base of the mixing vessel so the components are fully combined without excessive agitation.
For porous concrete, a suitable primer helps seal the surface and reduce outgassing. In some situations, more than one sealing coat is needed. This may add time and cost to the project, but it is a worthwhile trade-off when the finished surface is intended to feel calm, continuous and refined.
Design choices can influence what is practical, too. Matte finishes can disguise tiny surface variations better than a deep-gloss coating. Decorative flakes, terrazzo-inspired blends and carefully composed aggregates can bring visual depth while making minor marks less apparent. That does not lower the standard of preparation; it simply recognises that every resin finish has its own character and tolerance.
At Resinize, the specification is treated as part of the design. A hard-wearing garage floor, a statement retail space and a flowing metallic feature floor each demand different preparation, application methods and expectations of finish.
When to Stop and Seek Expert Help
A DIY repair may be reasonable for one or two small bubbles in a clear coating where an additional topcoat is already planned. It is less suitable when bubbles cover a broad area, appear in a newly laid floor, return after repair, or sit above a damp or unknown substrate.
Commercial floors need particular caution. Warehouses, retail units and busy garages place real demands on adhesion and durability. A small visual defect can be tolerated in some settings, but a failure beneath the surface can lead to peeling, moisture ingress and disruption later.
For homeowners, the decision often comes down to visibility. Before choosing a repair, view the floor from standing height in both daylight and artificial light. A pinhole that seems minor during application may become obvious beside a large window or beneath pendant lighting.
The best resin finishes feel effortless because the preparation was anything but casual. Give the surface the time, stable conditions and technical care it needs, and it can deliver the uninterrupted colour, depth and character that makes epoxy such a distinctive architectural material.