
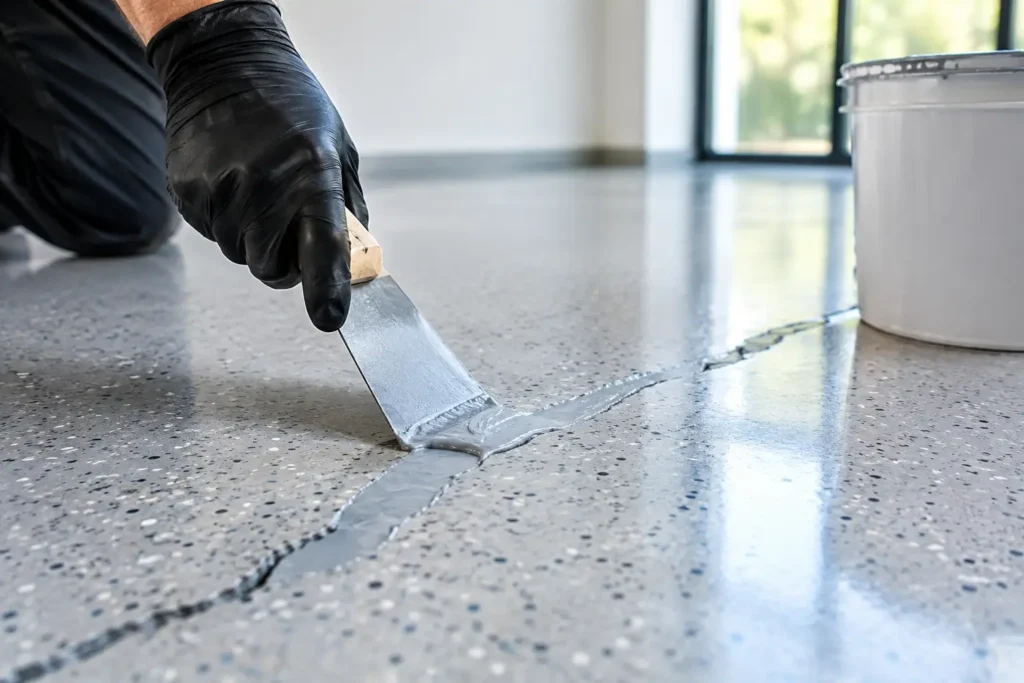
A resin floor should feel like one continuous, considered surface. When a crack appears across that finish, it interrupts more than the look of the room – it raises a practical question about what is happening below. Repairing cracked resin floors successfully is less about filling a visible line and more about understanding why it formed, then rebuilding the surface with the right materials and preparation.
For a quiet concrete-effect kitchen floor, a fine repair may blend beautifully. For a bold metallic feature floor or terrazzo-inspired overlay, the repair needs a more design-led approach to preserve the movement, depth and character of the finish. The best result is always determined before any resin is mixed.
Why resin floors crack
Resin is durable, seamless and highly resistant to daily wear when it is specified and installed correctly. It is not, however, a magic layer that can prevent movement in the substrate beneath it. Most cracks begin in the concrete or screed base, then transfer through the resin system as that base shifts, shrinks or responds to temperature changes.
New concrete and screed can continue to dry and contract after installation. Existing slabs can contain historic cracks that were not properly stabilised before coating. In older properties, movement may be linked to the building itself, while garages, warehouses and loading areas can experience stress from vehicle weight, vibration and point loads.
A crack can also be caused by moisture pressure below the floor, inadequate surface preparation, or a resin system chosen without enough flexibility for the environment. The visible line is only the clue. Treating it as a cosmetic imperfection without investigating the base risks a crack returning through an otherwise immaculate repair.
First, identify the type of crack
Not every crack requires the same response. A hairline crack in the topcoat may be localised and suitable for a carefully feathered repair. A wider crack that follows a joint, crosses a doorway or continues into adjacent areas is more likely to reflect movement below.
Look closely at whether the edges are level. If one side has lifted or dropped, the issue is not simply a surface fracture. If the line opens and closes with seasonal temperature changes, it may be an active movement joint rather than a crack that should be rigidly filled. Similarly, any damp patches, whitening, bubbling or soft areas near the crack deserve attention before refinishing.
For homeowners, it can be tempting to judge the problem by appearance alone. Yet the floor’s use matters just as much. A fine crack in a low-traffic bedroom and a fracture in a busy commercial kitchen do not carry the same performance requirements. The repair method needs to suit both the substrate and the demands placed on the finished surface.
Repairing cracked resin floors: the professional process
A lasting repair begins with a clean, stable repair zone. The damaged resin is generally opened up and removed along the crack, rather than simply coated over. This creates space to assess the substrate, remove weak material and form a sound edge for the new system to bond to.
Stabilising the substrate
Where the crack is dormant, the substrate can often be mechanically prepared and repaired with an appropriate resin repair mortar or flexible filler, depending on the crack and floor specification. The aim is to create an even, stable base without leaving a high spot that will show through a seamless finish.
Where movement is active, the solution may involve retaining or recreating a movement joint. This is a deliberate design and engineering choice. Bridging a moving joint with a rigid material can produce a temporarily tidy result, but the stress will often find its way back to the surface.
Moisture readings may also be needed, particularly on ground-floor slabs, in garages and in spaces where previous finishes have failed. If moisture vapour is contributing to the issue, a suitable moisture-management primer or a revised system may be necessary before the repair moves forward.
Rebuilding the resin finish
Once the base is stable, the repaired area is primed and built up to match the surrounding floor. For a single-colour resin floor, this may involve a local repair followed by a broader recoat to restore an even sheen. With decorative systems, colour, aggregate distribution and application technique all affect whether the repaired area recedes into the overall composition.
This is where the difference between a functional patch and a considered restoration becomes clear. Terrazzo-style finishes need aggregate that matches in size, tone and density. Concrete-effect resin requires controlled movement in the trowel work. Metallic resin is particularly expressive, so a local patch may remain visible even when it is technically sound. In those cases, recoating a larger section or the full room often creates the more refined result.
Finishing for protection and consistency
The final protective coat determines much of the floor’s appearance and everyday resilience. It can influence gloss level, slip resistance, UV stability and ease of cleaning. A satin finish may be the better choice for a family hallway where a softer, architectural feel is wanted, while a hard-wearing commercial coating may need a more specific finish for grip and maintenance.
The repaired area must cure fully before it is returned to use. Rushing this stage can mark the new surface or compromise its final performance, especially where furniture, appliances or vehicles will be placed back onto the floor.
When a local repair is enough
A localised repair can be a sensible, cost-effective choice when the crack is stable, the surrounding resin remains well bonded, and the finish is forgiving enough to blend. Plain colours, subtle concrete effects and discrete areas beneath fixed furniture are often good candidates.
It is less suitable when cracking appears in several locations, when the floor has lost adhesion, or when the existing design has dramatic veining, metallic movement or visible aggregate. A broad refresh may require more investment, but it can restore the uninterrupted visual impact that made resin the right choice in the first place.
There is also an aesthetic trade-off worth being honest about. Even an expertly completed local repair may be detectable under certain light, particularly on dark, high-gloss or highly decorative surfaces. A professional should explain that possibility before work starts and recommend the scope of repair accordingly.
What not to do with a cracked resin floor
Avoid applying a generic filler directly over the visible crack, then painting or coating it without preparation. It is unlikely to match the floor’s movement, appearance or bonding requirements. Similarly, sanding a small area and adding an untested resin product can create a difference in colour, gloss or chemical compatibility.
Do not assume a crack is harmless because it is narrow. A fine line may be dormant, but it may also be the first visible sign of substrate movement or moisture-related stress. Equally, do not assume every crack means the whole floor has failed. Well-installed resin floors can often be repaired selectively when the underlying issue is correctly diagnosed.
If the floor is within a garage, workshop, retail space or warehouse, consider how the repair will cope with the actual traffic pattern. Turning tyres, pallet trucks, wheeled equipment and heavy shelving can expose weak preparation quickly. Residential spaces have different pressures, from underfloor heating cycles to dropped items and frequent cleaning, but they still benefit from a repair system selected for the setting.
Preventing future cracks
Prevention begins long before the final coat. A resin floor depends on a properly prepared base, correct moisture control, suitable primers and an appropriate system build-up. Existing joints and cracks should be assessed during the survey rather than disguised at the end of the project.
After installation, sensible care helps protect the finish. Use protective pads beneath furniture, clean spills promptly, avoid harsh abrasive products and lift rather than drag heavy objects. In commercial areas, planned cleaning and maintenance also make it easier to spot changes before a small issue becomes a more disruptive repair.
For design-led spaces, the most satisfying repair is one that preserves the original intention: a calm, continuous surface that supports the room rather than distracts from it. Resinize approaches repairs with that same balance of technical precision and artistry, considering not only how the floor performs, but how it should feel when the space is complete again.
A crack does not have to define the future of a resin floor. With a clear diagnosis and a repair tailored to the substrate, finish and setting, the surface can regain both its strength and its visual confidence.