A bare concrete staircase is rarely just a practical route between levels. It is often the first hard surface seen in a hallway, garden approach, retail entrance or commercial workspace – and every chip, dust mark and patch of uneven colour is highly visible. Knowing how to coat concrete stairs properly means treating them as a demanding architectural surface, not simply painting over tired concrete.
A professionally applied resin coating can turn functional steps into a clean, continuous feature with real design presence. The result can be understated and concrete-inspired, terrazzo-led, richly coloured or finished with decorative movement. Yet appearance only lasts when the preparation, material choice and slip-resistance specification suit the staircase and the way it will be used.
Start with the condition of the concrete
Concrete stairs need to be sound, dry and stable before any coating system is considered. Resin follows the profile of the substrate beneath it. It can refine a surface beautifully, but it will not disguise structural movement, loose edges or dampness rising through the concrete.
Begin by looking closely at every tread, riser and landing. Fine hairline cracking may be manageable after the right repair, particularly where it is historic and no longer moving. Wider cracks, crumbling nosings, hollow areas and signs of active movement need investigating before coating begins. If a stair edge is breaking down, applying a decorative finish first only delays the repair that is actually needed.
Moisture deserves equal attention. Concrete can appear dry at the surface while still holding moisture within its slab. This is especially common on ground-level, external or basement-connected stairs. A suitable moisture test helps establish whether a damp-proof membrane, moisture-tolerant primer or a different system is required. Skipping this stage can lead to blistering, delamination and an uneven finish that no premium coating should have to hide.
The setting also shapes the specification. Indoor stairs in a private home face a different challenge from steps between a garage and utility room, a retail entrance or an exterior terrace. Footfall, water exposure, sunlight, mud, cleaning methods and footwear all influence the coating build-up.
How to coat concrete stairs: choose the right system
There is no single resin finish that suits every staircase. The best approach balances visual intent with performance. For an interior statement stair, a decorative epoxy or seamless resin overlay can create a refined, monolithic look. In hard-working settings, a heavy-duty resin system may be the stronger choice, with selected aggregates incorporated for grip.
Epoxy is valued for its bond strength, depth of finish and creative potential. It can support solid colours, terrazzo-inspired effects and decorative details that make a stair feel intentionally designed rather than merely protected. However, standard epoxy can amber under strong UV exposure, so external stairs and sun-drenched thresholds often call for a UV-stable polyurethane or polyaspartic topcoat.
Texture is a decision to make early, not a last-minute addition. A high-gloss finish can look striking in a controlled interior, but smooth resin becomes less forgiving when water or grit is introduced. On stairs, safety and style should work together. Fine anti-slip aggregate can be broadcast into the wearing coat or incorporated in the topcoat to provide traction without making the surface feel aggressively rough underfoot.
Colour affects usability too. Very dark treads can show pale dust and scratches; very pale ones reveal marks from busy shoes. A mid-tone, lightly variegated finish is often more relaxed to live with, while still delivering a crisp, contemporary appearance. For commercial spaces, contrast between tread and riser can also make step edges easier to read.
Preparation is where the finish is won
The coating process starts with thorough mechanical preparation. Depending on the condition and location of the stair, this may involve diamond grinding, captive blasting or another controlled method to remove weak laitance, old paint, contaminants and surface residues. The aim is to create a clean, open-textured concrete profile that allows the primer to anchor properly.
Simply washing and coating is not enough. Oils, waxes, curing compounds and previous sealers can interfere with adhesion, even when they are invisible. Dust must then be extracted carefully from corners, riser junctions and edges. On a staircase, these details are not incidental. They are where poor preparation and rushed workmanship tend to reveal themselves.
Repairs follow once the substrate is exposed. Cracks are opened and filled where appropriate, holes are rebuilt, and damaged nosings are re-profiled to restore clean lines. A resin mortar may be used for more substantial local repairs. The staircase should be checked for consistent tread levels and sharp but comfortable edge definitions before the decorative layers begin.
Next comes the primer. This layer stabilises the prepared concrete and supports adhesion between substrate and coating. Porous or variable concrete may need additional priming to prevent air escaping into the resin and creating pinholes. Where moisture levels demand it, a specialist moisture barrier forms part of the system rather than an optional extra.
Build the coating around the shape of the stair
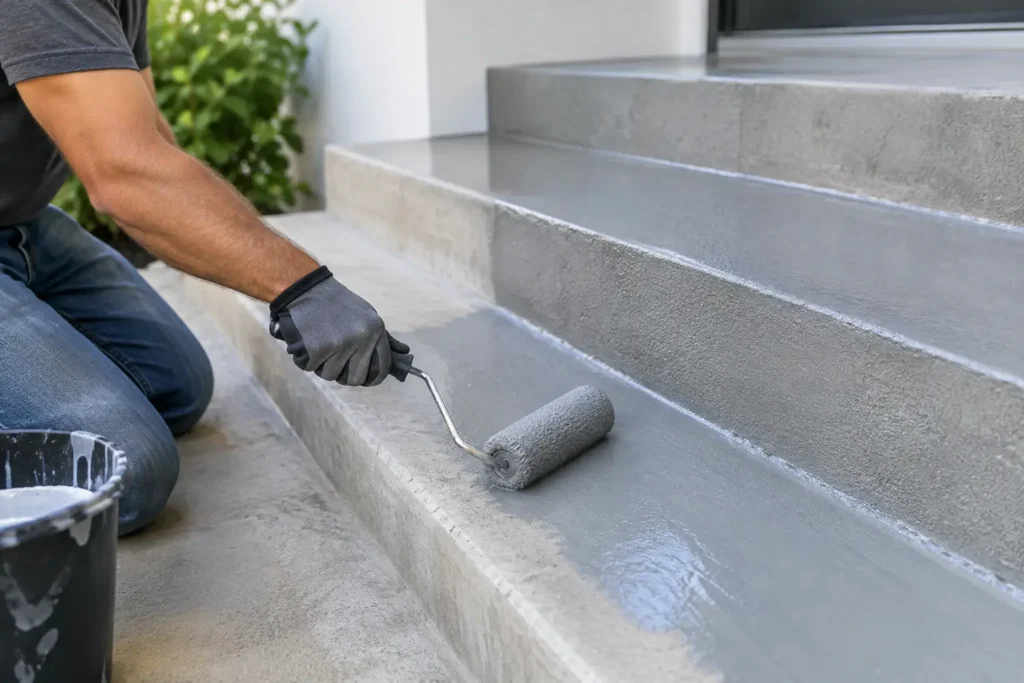
Stairs are more complex than flat floors. Every riser, return, corner and nosing must be coated evenly, with carefully controlled transitions between horizontal and vertical planes. Material can naturally flow towards edges, which is why timing, viscosity and application technique matter so much.
After priming, the chosen resin body coat or overlay is applied across the treads and risers. Decorative effects may be layered during this stage, whether that means a quiet concrete-effect movement, a bolder metallic expression or a terrazzo-inspired aggregate finish. The key is consistency. A staircase reads as one continuous design feature, so a slightly different sheen or colour density on one tread can be surprisingly noticeable.
Nosing detail needs particular care. The front edge of every tread receives concentrated wear and is the most exposed part of the stair. A well-specified system protects it, but it must also preserve a clear, safe edge. In some environments, an integrated anti-slip strip or contrasting detail is sensible. In others, a finely textured resin topcoat provides enough grip while retaining the seamless look.
The final seal coat is where durability and tactile quality come together. It protects the decorative work below from abrasion, stains and routine cleaning. A satin or matt finish often works especially well for residential interiors because it softens reflected light and disguises minor everyday marks better than full gloss. High-gloss can be effective, but it suits spaces where its reflective quality is a deliberate part of the design.
Curing, access and looking after the surface
Resin coatings may feel dry to the touch before they are ready for normal traffic. Cure time depends on the product, temperature, humidity and coating thickness. The staircase should remain protected from foot traffic, dust and moisture for the period specified by the installer. Trying to use it too early can leave permanent impressions or compromise the final surface.
Plan access before work starts. If the stairs are the only route through a home or business, the installation may need to be phased or scheduled around quieter periods. This is one reason a site-specific approach is more valuable than a generic coating kit: the finish is only one part of managing a successful project.
Once cured, resin-coated stairs are straightforward to maintain. Sweep or vacuum grit regularly, then clean with a pH-neutral product and a soft mop or cloth. Avoid harsh solvents, highly alkaline cleaners and abrasive pads, which can dull or damage the topcoat over time. Entrance matting near external doors is a simple investment that reduces tracked-in grit and preserves the finish on heavily used treads.
When professional installation makes the difference
Coating concrete stairs is achievable only when the substrate, material and application conditions are properly understood. Small domestic stairs may look simple, but they leave very little room for uneven edges, inconsistent texture or missed preparation. External stairs and high-traffic commercial steps introduce further demands around UV stability, drainage and slip resistance.
For design-led results, samples are invaluable. They allow you to judge colour, texture and sheen in the actual light of the space, rather than relying on a screen image. At Resinize, that sample-led process helps turn a practical requirement into a surface with a considered architectural role.
A well-coated concrete staircase should feel effortless to use and impossible to overlook: durable beneath busy feet, safe in changing conditions, and finished with the precision that lets the whole space feel more resolved.